Vaults are used to store client property in order to organize the property, maximize warehouse space, prevent theft or loss of client property, and maintain organization and order of the warehouse.
Keep all vaults closed except when loading, unloading, or processing contents. If necessary, reinforce the inside of vaults to support movement and content load.
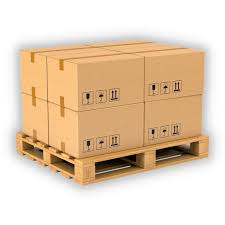
1. Place all boxes on pallets
Place all boxes on pallets to ensure easy movement and organization within the vault. By stacking the boxes on pallets, it helps in preventing damage to the contents and facilitates efficient handling during loading and unloading processes. This step also aids in maximizing the use of space within the vault by creating a uniform and stable base for the boxes.
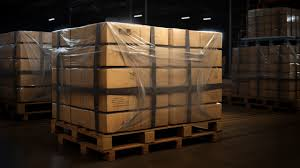
2. Stretch-wrap boxes together
Stretch-wrap the boxes together using stretch wrap film to secure them tightly and prevent them from shifting during transportation or storage. Start by placing the boxes on pallets to create a stable base, then wrap the boxes together using the stretch wrap film, ensuring that all sides are tightly secured. This step helps to maintain the integrity of the contents and facilitates safe handling and storage within the vault.
3. Place all tagged items into the vaults
Except:
- Appliances
- Large mattresses
- Electronics
- Large pieces of glass
- Artwork
- Large sofas and other furniture items that will not fit into the vault
4. Place heavy items on the floor of the container
Place heavy items on the floor of the container to ensure stability and prevent damage to lighter items. This will help distribute weight evenly and reduce the risk of items shifting during transportation or storage within the vault.
5. Wrap all items in load blankets to ensure they cannot be scratched or broken
Wrap all items in load blankets to protect them from scratches or breakage during storage. This step ensures that the items are securely wrapped before being placed in the vault for safekeeping.

6. Stack smaller items on top of heavier items
Place heavier items at the bottom of the vault to provide a stable base. Then, stack smaller items on top to maximize space utilization while ensuring weight distribution and stability within the container. This arrangement helps prevent damage to the items and allows for efficient organization within the vault.
7. Fill vaults as full as possible without posing potential damage to the items in the container
Load the vault similarly to a transport truck. Keep boxes together as much as possible. Keep heavy items in the center of the vault.
Make sure all content is secure and will not tilt or fall over with moderate movement from a forklift. Utilize space as efficiently as possible.
8. Close the door of the vault when filled
9. Place a bubble sheet on the outside of the vault that identifies the numbers in the container
Place a bubble sheet on the outside of the vault to clearly identify the numbers contained within. This labeling ensures easy retrieval and organization of items stored in the vault.
10. Set up a separate vault for these items
- Artwork
- Large pieces of glass
- Electronics and other expensive items (place a hasp and lock on this vault)
11. Do not pack wet or moldy contents into a vault
Ensure that items that are wet or show signs of mold are not placed inside the vaults to prevent damage to other contents and maintain the overall quality of the stored items.