The Property Management Feature in PSA Web allows customers to create jobs without having to insert repeated related companies and contacts.
- An example would be a condo building, our customer may have reoccurring jobs in the condo building with the owners of the condo needing to be billed and there may be hundreds of condos in building. The same companies and contacts (job -> relationships) will be on the job; therefore, this feature will reduce the amount of repetitive data input.
- To have the Property Management Feature turned on email Support at support@canamsys.com. They will turn on the feature.
Please contact PSA’s Support Department if you need additional assistance.
1. Select the property type in 'Company Settings'
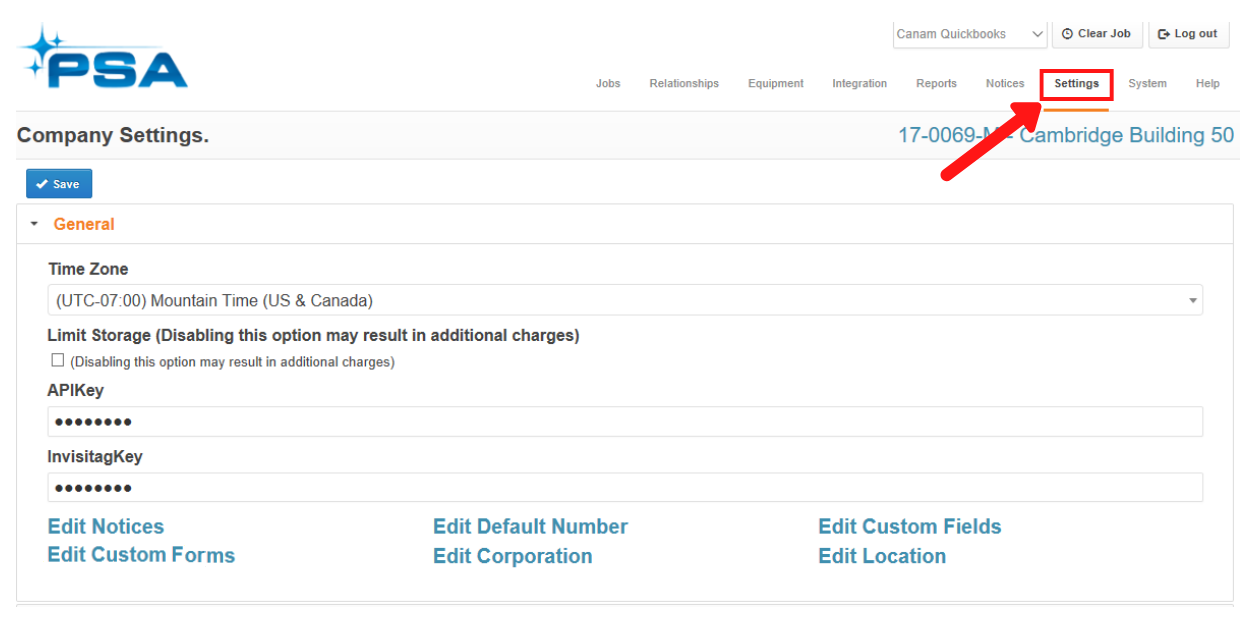
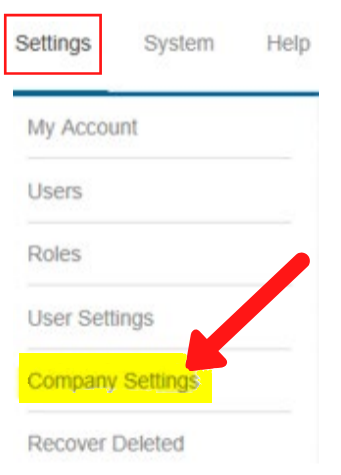
The Property Type is the Company Type that the property will be based off and this can be selected by navigating to:
- Settings -> Company Settings -> Relationships

2. Select a Property Type from the dropdown menu
3. Click 'Save'

NOTE:
- If you are syncing with PSA Desktop the “site” has to be added to the type on a customer profile.
- This will then sync to the web to be selected.
- If you are not syncing with PSA Desktop add “site” to the company type in PSA Web
2. Select property type relationships
Once the site type has been chosen in company settings the type will now have to be added to the company under Relationships.
To add the site type to a company:
1. Navigate to 'Relationships' -> 'Companies'.
2. Choose the company to add the site type to
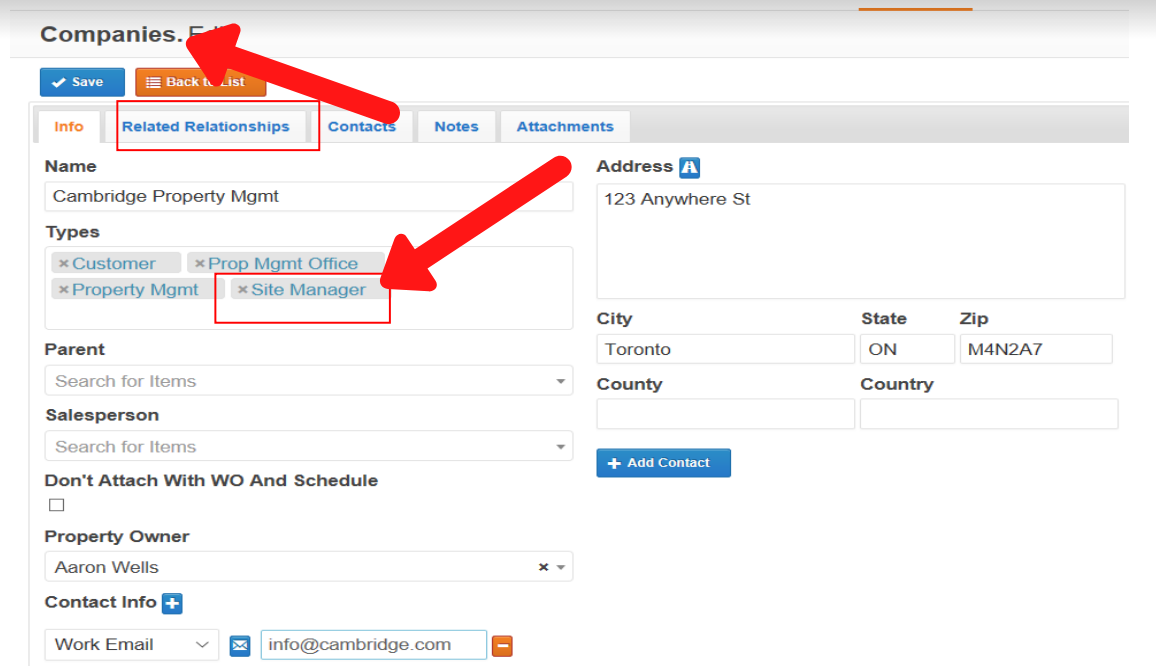
NOTE: A new tab will appear on the company profile called 'Related Relationships'
Add a related Company from the Related Relationships tab
- Select 'Company'
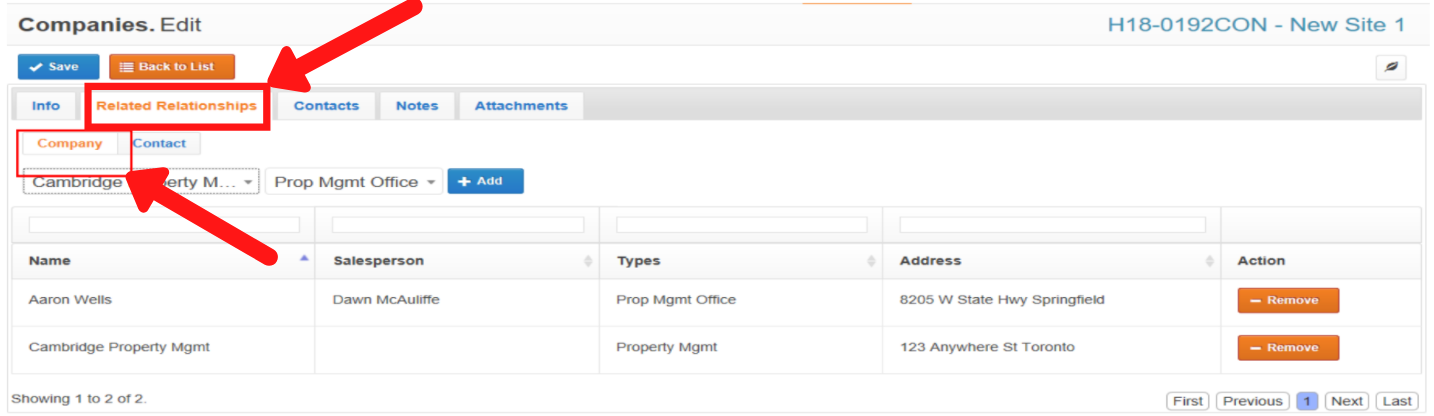
- Search for the company that is related to the site company
- Click '+Add'
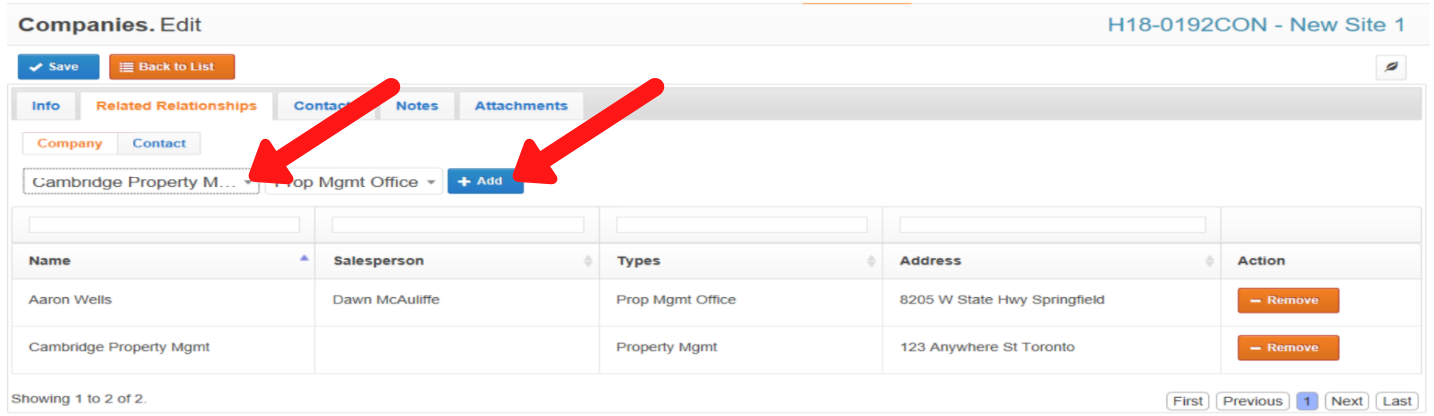
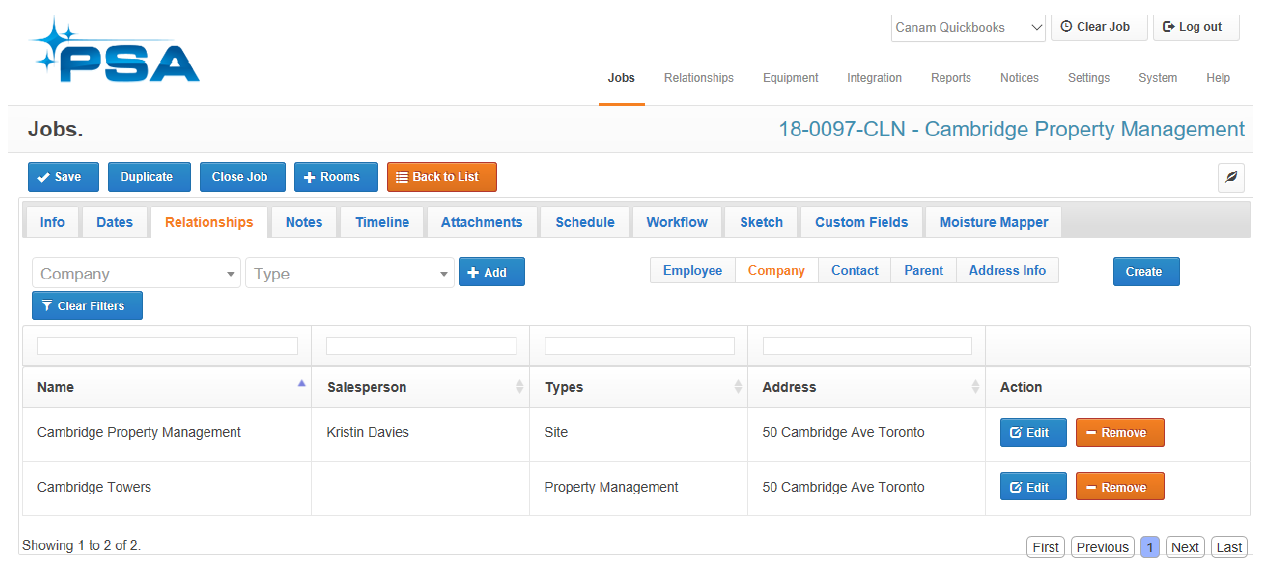
NOTE: All related companies in this list will be linked to a job, if the property company is selected as customer.
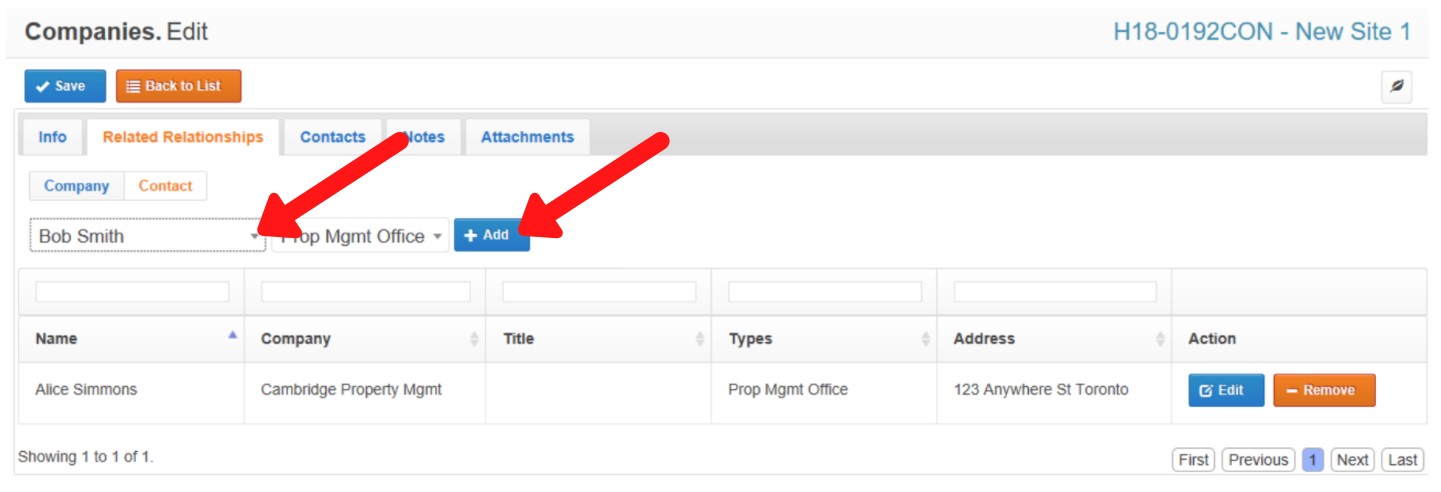
Add a related Contact from the Related Relationships tab
1. Select 'Contact'
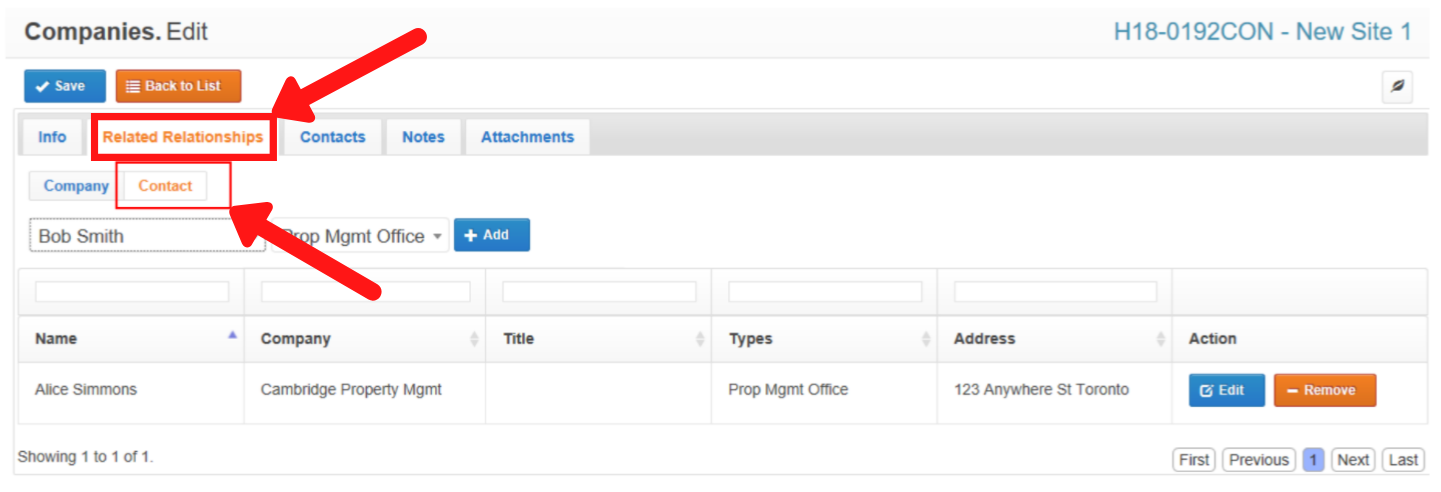
Search for the contact that is related to the site company
2. Click '+Add'
3. Choose the property owner
On the info tab, the field 'Property Owner' will be displayed only for Property Companies.
The purpose of this is as follows:
- Owner Selected: The customer of the job will be the Owner Company
- No Owner Selected: The customer of the job will be the Property Company
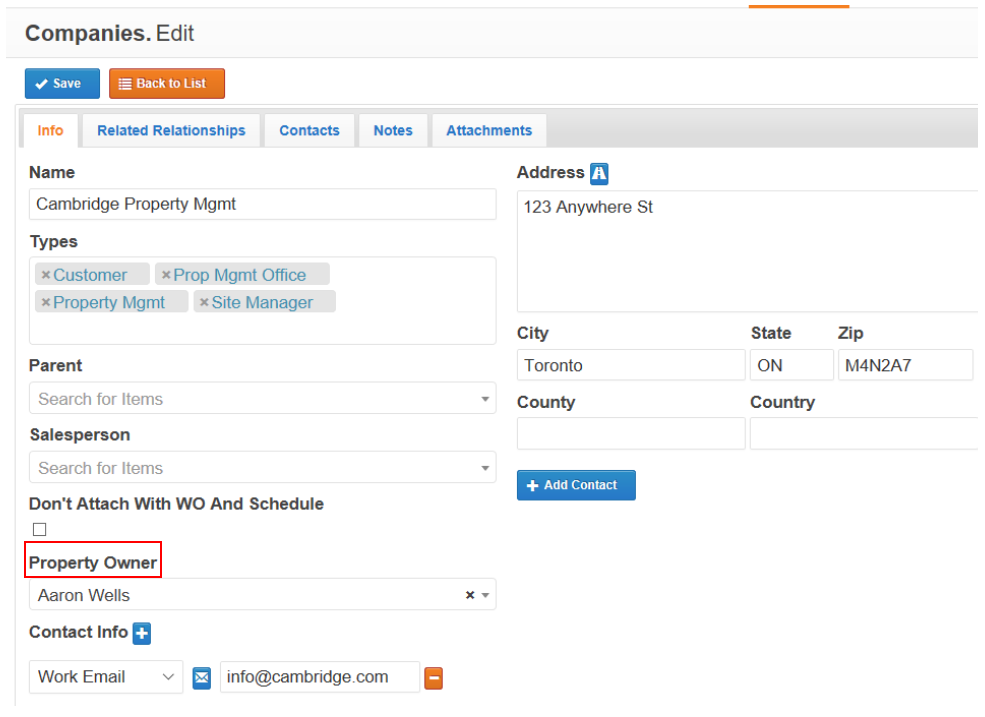
4. Link property contacts to e job
In the contacts of the Property Company the user will have the option to transfer the contact to the job when the property company is selected on the job.
- Enabling 'Transfer To Job' will link the property contacts to the job

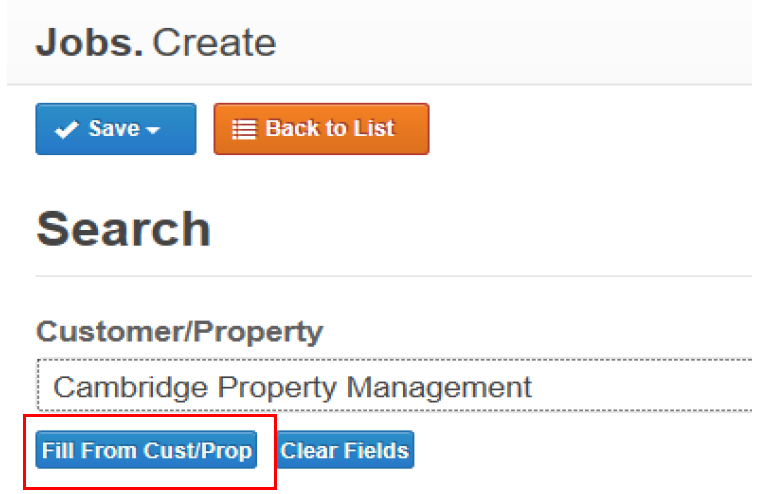
5. Create property jobs
1. On the Job Look up screen select '+Create'
2. When Property Management feature is turned on you will have an additional feature to 'Fill From Customer or Property'
- The user will select the customer/property as usual from this screen and select 'Fill from' to add customer details.
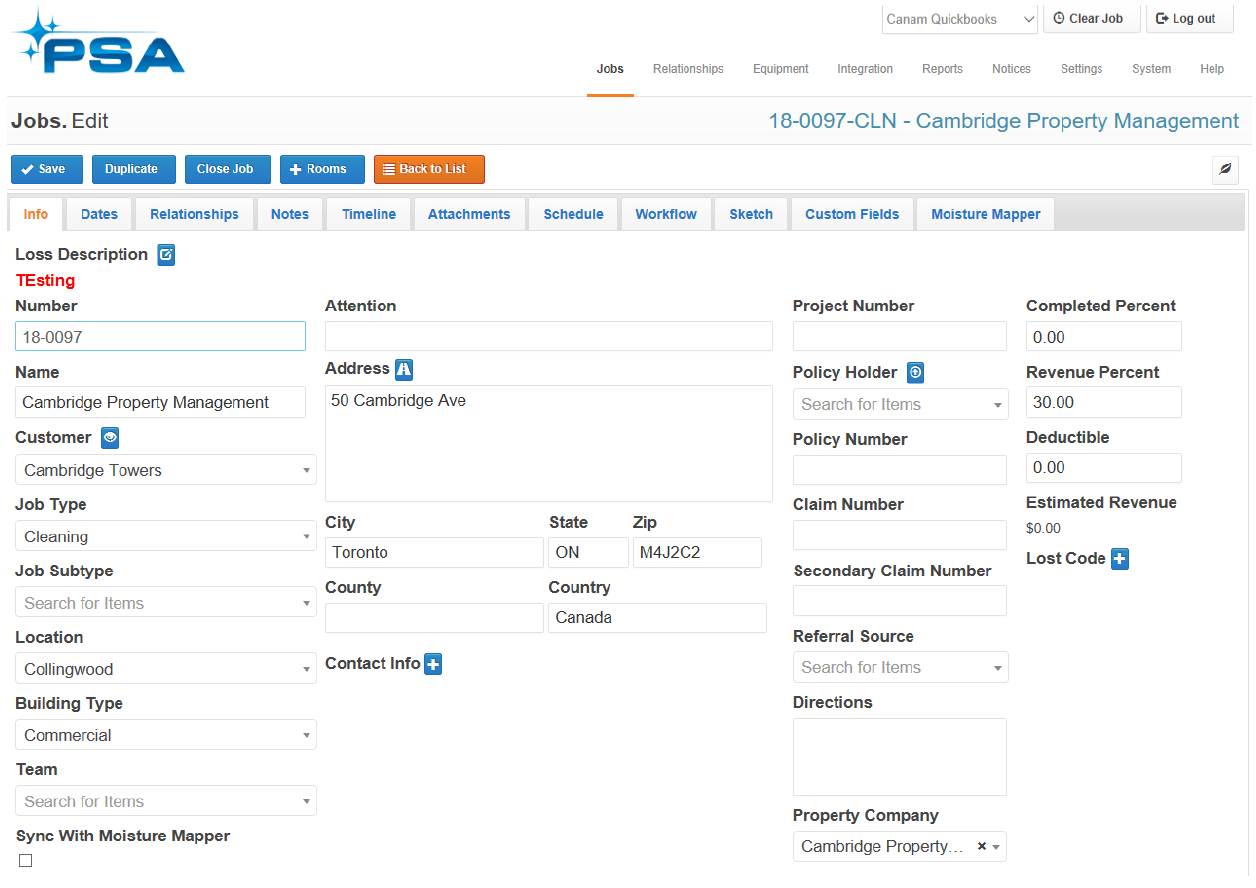
On Job Creation, selecting the Property Company, the following occurs:
1. Customer will be populated with the 'Property Owner' – if filled – otherwise fill with actual property
2. Job Address will be filled with 'Property'
3. Property -> 'Related Companies' Copy to Job -> Relationship -> Company
4. Property -> 'Contacts' (only those with 'Transfer to Job' option enabled) Copy to Job -> Relationship -> Contact
5. Job 'Property Company' will populate with Property
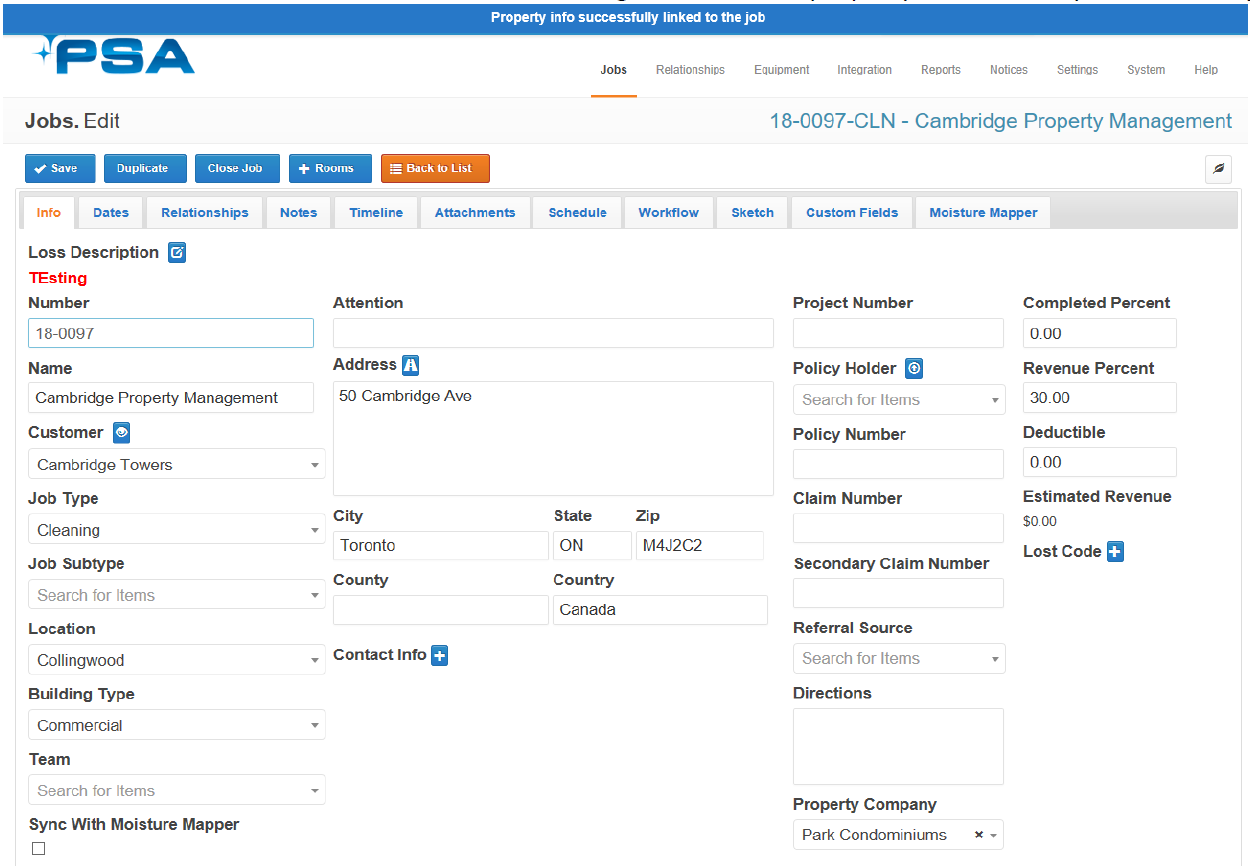
6. Change property company on a job
To change a property company on a job navigate to 'Jobs' -> 'Info' tab
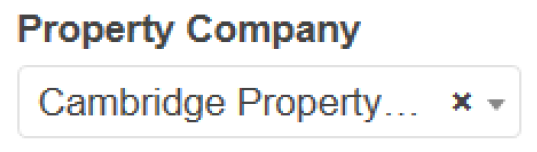
The dropdown is populated with all the Companies that have the 'Property Type'
- If the user selects a different Property from the drop down, they will be prompted with the message below
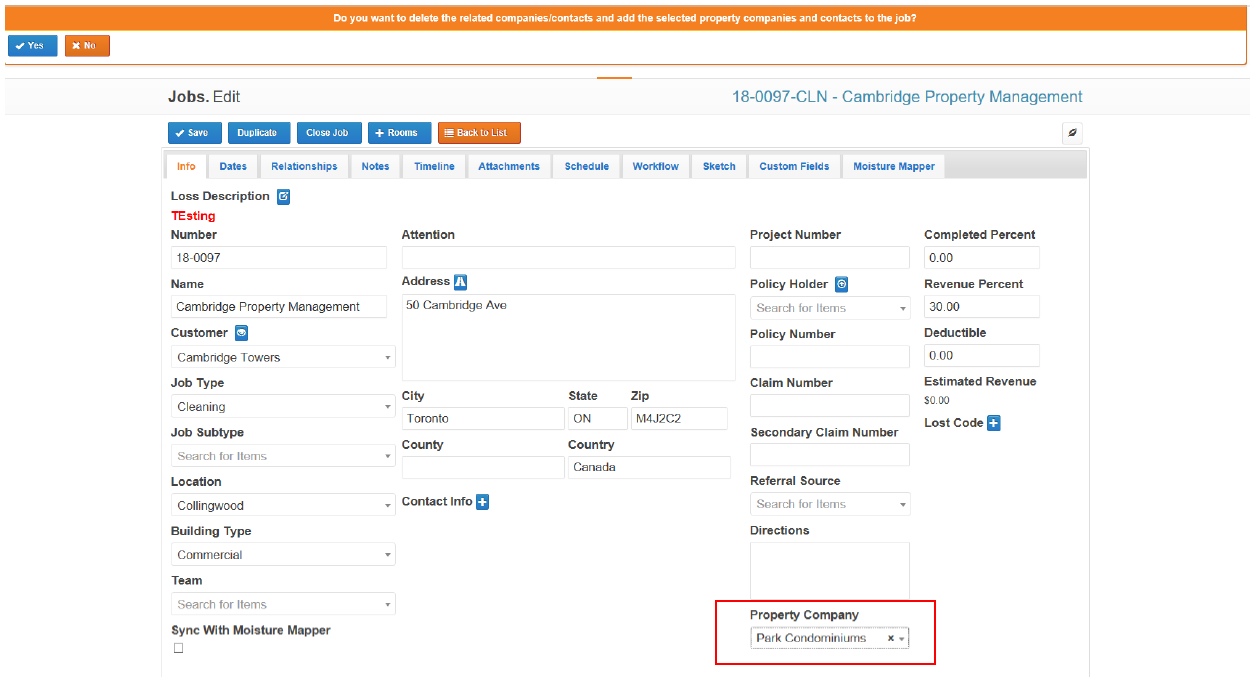
- If the customer clicks 'Yes' the job will remove previous companies and contacts on the relationship tab and replace with the new selected property
Once 'Yes' is selected the user will receive the message that the new property is successfully linked to the job.