This process description provides guidance on how to address common problems encountered during water mitigation jobs. It outlines steps and strategies to effectively mitigate water damage and minimize further issues.
1. Initial scope not complete- needs additional work
Alert the homeowner and management

Go over the initial scope and identify any areas that require additional work.
Review the project's initial scope and assess if there are any areas that were not adequately addressed or require further attention.
This step is crucial to ensure that all necessary tasks are completed and no issues are left unresolved.
Take the time to thoroughly inspect the job site and consult with the team to identify any outstanding tasks or areas that need additional work.
Addressing these issues promptly will help maintain the project's progress and prevent any delays or complications.
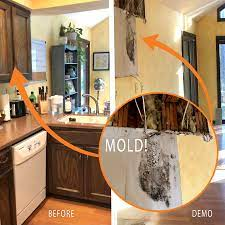
2. Mold Discovered during water mitigation
During the water mitigation process, it is not uncommon to encounter the discovery of mold. Mold can pose a significant health risk and should be addressed promptly. Take the following steps to effectively handle the situation:
Upon discovering mold during the job, take immediate action to prevent further contamination and address the issue effectively. Here are the steps to follow:
1-Alert the homeowner of this discovery and explain that at this point you will contain the area to help prevent any further contamination
2-Alert management of the situation


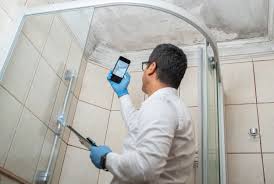
1. Assess the extent of mold growth: Inspect the affected area to determine the size and scope of the mold growth. Look for visible signs of mold, such as discoloration or a musty odor.
2. Ensure personal protective equipment (PPE): Before proceeding, make sure you have the necessary PPE to protect yourself from mold spores. This may include gloves, goggles, a respirator, and protective clothing.

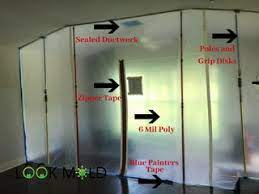
3. Contain the mold: Isolate the affected area to prevent the spread of mold spores to other parts of the building. Use plastic sheeting and tape to seal off the area, creating a containment barrier.
By following these steps, you will effectively address the mold problem and ensure a safe working environment for the team.
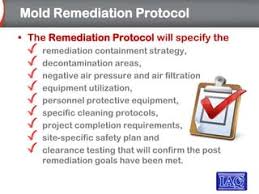
Remember to consult with a professional mold remediation specialist if the contamination is extensive(over 10SF) or if you have any concerns about the remediation process.
Remember, mold can be hazardous to health, so it is important to follow proper safety precautions and consult with professionals if needed.
3. Water source is not fixed
Alert the homeowner and management


Check the water source to ensure that it is properly fixed and not causing any further water damage.

Identify the source of the water leakage and take the necessary steps to stop it.
This may involve shutting off the water supply, repairing leaks, or replacing damaged pipes or fixtures.
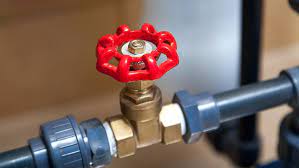
This may require calling a plumber out to the home


4. Homeowner not home for appointment

When the homeowner is not available for the scheduled appointment, follow these steps to address the situation:
1. Contact the homeowner: Reach out to the homeowner via phone call or email to inform them about their absence. Ask if they are available to reschedule the appointment.
2. Reschedule the appointment: If the homeowner is unable to be present at the scheduled time, work with them to find a suitable alternative appointment slot. Consider their availability and any other constraints that may need to be taken into account.
3. Communicate the rescheduled appointment: Once a new appointment time is agreed upon, inform the homeowner about the updated schedule. Provide them with all the necessary details, such as the date, time, and any specific instructions they need to follow before the appointment.
4. Document the communication: Keep a record of all the communication with the homeowner regarding the rescheduled appointment. This documentation will help maintain clarity and avoid any misunderstandings in the future.
5. Adjust the project timeline: Take into account the rescheduled appointment when planning the overall project timeline. Ensure that any subsequent steps or tasks affected by the homeowner's absence are appropriately adjusted to avoid delays or conflicts.
Remember, effective communication and flexibility are essential when dealing with situations where the homeowner is not available for a scheduled appointment. By following these steps, you can manage the situation professionally and maintain a smooth workflow throughout the project.
5. Material not drying
Check the materials that are not drying properly.
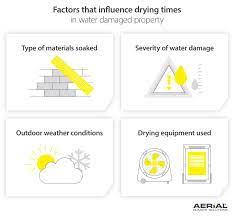
Inspect the affected area and determine the cause of the issue. This could be due to high humidity, inadequate airflow, or insufficient time for the materials to dry.
Check the materials that are not drying properly.
Inspect the affected area and determine the cause of the issue.
This could be due to high humidity, inadequate airflow, or insufficient time for the materials to dry.
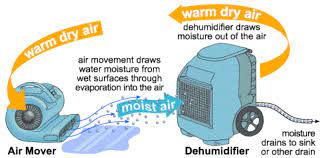
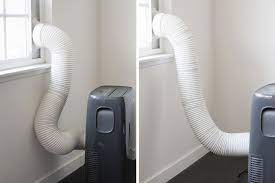
Ensure that there is proper ventilation in the area to allow the materials to dry effectively. Open windows or use fans to improve airflow if necessary.
6. Homeowner has turned off or unplugged equipment

Ensure that the homeowner understands the importance of keeping the equipment turned on throughout the mitigation process.
Explain to the homeowner the potential consequences of turning off the equipment, such as prolonged drying time and increased risk of mold growth.
Provide clear instructions on how to operate the equipment and emphasize the need for continuous operation.
If the homeowner has turned off the equipment, politely remind them to keep it turned on and address any concerns or questions they may have.
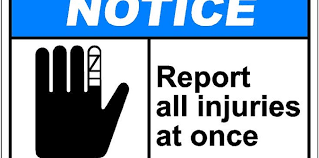
7. Employee Injury
Notify your supervisor immediately about the employee's injury and provide any necessary first aid or medical assistance.

Follow the company's protocol for reporting and documenting workplace injuries.

Ensure that the employee receives appropriate medical treatment and support throughout the process.